カメラの設定
サンプルコード
- iOS: ViewController.swift
- Android: SimpleTextScannerActivity.java
OCR を行うにはカメラからのフレームを SDK に渡す必要があります。このページではカメラのセットアップ方法を説明します。
1. カメラ権限の設定
- iOS (Swift)
- Android (Java)
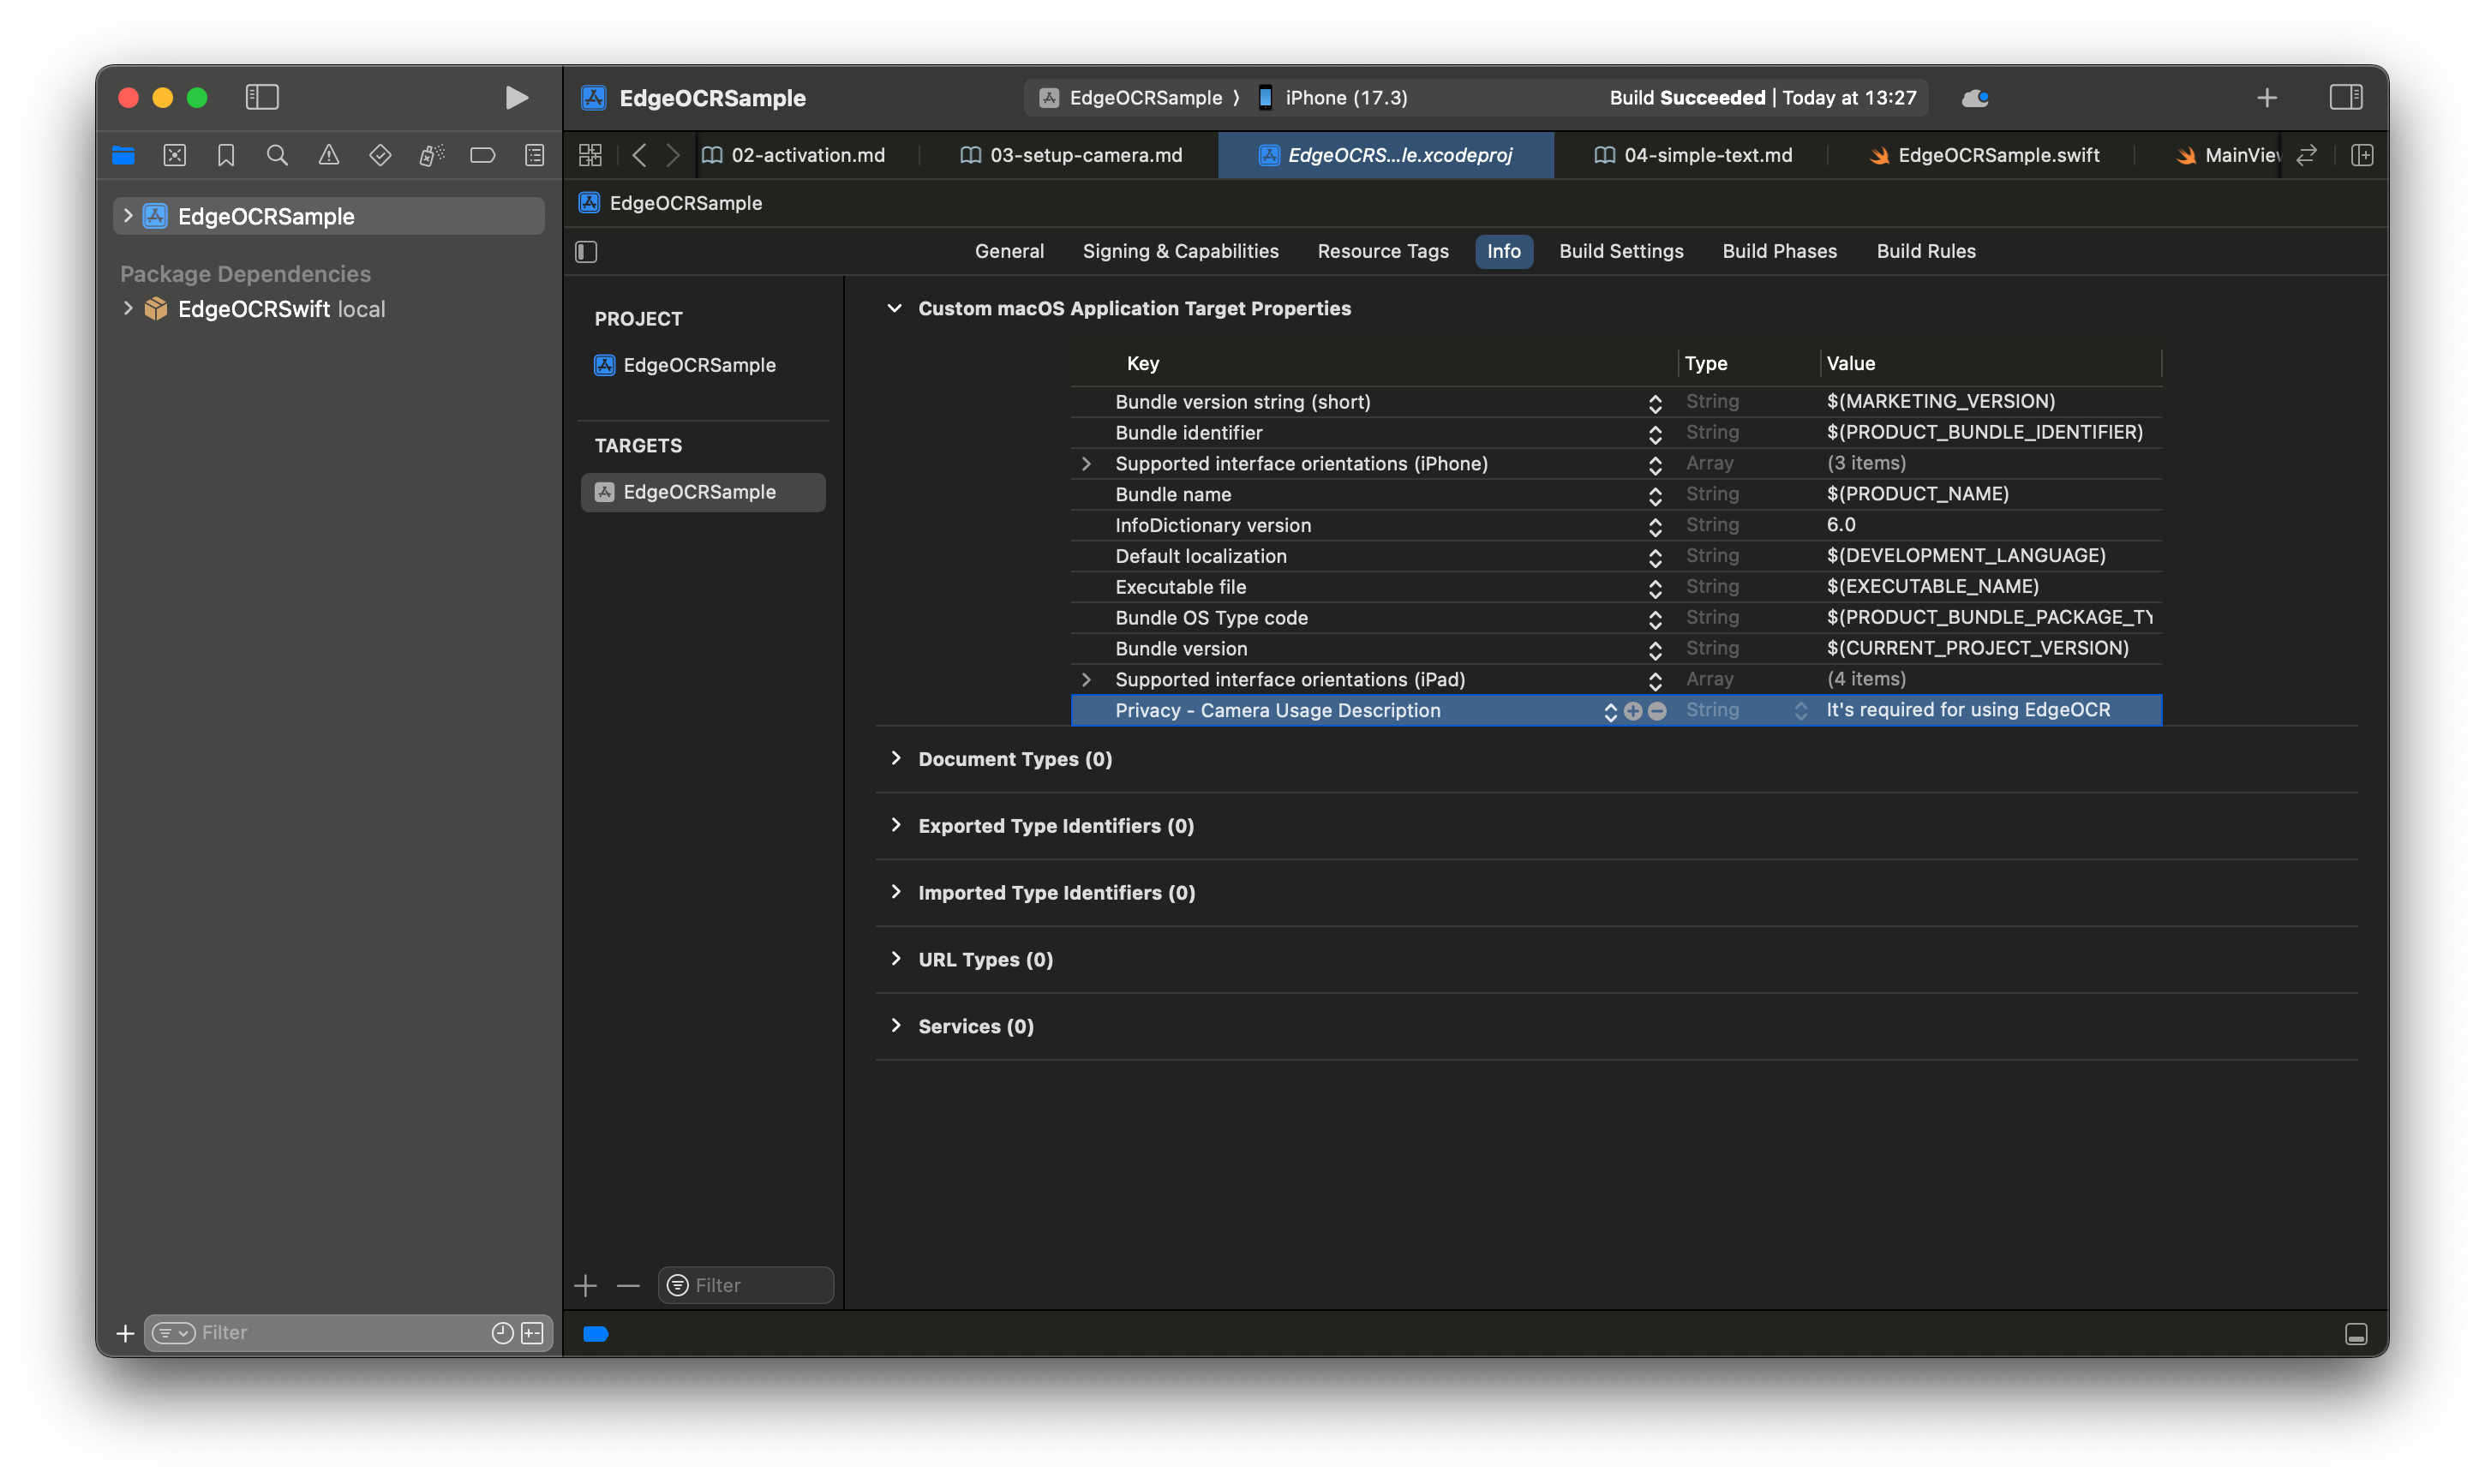
Info.plist にカメラの使用用途を追加します。
Xcode で プロジェクト > Info > Custom iOS Target Properties を開き、Privacy - Camera Usage Description を追加して適切な使用用途を記述してください。
AndroidManifest.xml に以下のパーミッションを追加します。
<uses-permission android:name="android.permission.CAMERA" />
<uses-feature android:name="android.hardware.camera" />
<uses-feature android:name="android.hardware.camera.autofocus" />
2. カメラセッションの設定
- iOS (Swift)
- Android (Java)
AVCaptureSession を使ってカメラ入力・出力を設定します。
import AVFoundation

private let captureSession = AVCaptureSession()
private lazy var videoOutput = AVCaptureVideoDataOutput()

func setupCaptureSession() {
    guard let videoDevice = AVCaptureDevice.default(
        .builtInWideAngleCamera, for: .video, position: .back
    ) else { fatalError("カメラデバイスが見つかりません") }

    let videoDeviceInput = try! AVCaptureDeviceInput(device: videoDevice)
    captureSession.addInput(videoDeviceInput)
    captureSession.addOutput(videoOutput)
    captureSession.sessionPreset = .high

    let sampleBufferQueue = DispatchQueue(label: "sampleBufferQueue")
    videoOutput.setSampleBufferDelegate(self, queue: sampleBufferQueue)
    videoOutput.alwaysDiscardsLateVideoFrames = true

    // ピクセルフォーマットは kCMPixelFormat_32BGRA を必ず指定
    videoOutput.videoSettings = [
        String(kCVPixelBufferPixelFormatTypeKey): kCMPixelFormat_32BGRA
    ]
    videoOutput.connection(with: .video)?.videoRotationAngle = 90.0
}
ピクセルフォーマット
SDK は kCMPixelFormat_32BGRA を前提としています。他のフォーマットを指定すると正しく動作しません。
CameraX の ImageAnalysis を使用します。
import androidx.camera.core.ImageAnalysis;

ImageAnalysis imageAnalysis = new ImageAnalysis.Builder()
    .setOutputImageFormat(ImageAnalysis.OUTPUT_IMAGE_FORMAT_YUV_420_888)
    .setBackpressureStrategy(ImageAnalysis.STRATEGY_KEEP_ONLY_LATEST)
    .build();
OUTPUT_IMAGE_FORMAT_YUV_420_888— SDK が受け付ける画像フォーマットです。STRATEGY_KEEP_ONLY_LATEST— 最新フレームのみを保持し、ノンブロッキングで解析を行います。
3. フレームごとの OCR 処理
カメラから取得した各フレームを SDK に渡して OCR を実行します。
- iOS (Swift)
- Android (Java)
AVCaptureVideoDataOutputSampleBufferDelegate の captureOutput 内で scan を呼び出します。
func captureOutput(
    _ output: AVCaptureOutput,
    didOutput sampleBuffer: CMSampleBuffer,
    from connection: AVCaptureConnection
) {
    guard let scanResult = try? api.scan(
        sampleBuffer,
        viewBounds: viewBounds,
        cropRect: cropRect
    ) else { return }

    let detections = scanResult.getTextDetections()
    for detection in detections {
        let text = detection.getText()
        if !text.isEmpty {
            print("detected: \(text)")
        }
    }
}
ImageAnalysis.Analyzer 内で scan を呼び出します。
imageAnalysis.setAnalyzer(analysisExecutor, image -> {
    if (!api.isReady()) {
        image.close();
        return;
    }
    try {
        ScanResult scanResult = api.scan(image);
        List<Text> detections = scanResult.getTextDetections();
        for (Text detection : detections) {
            String text = detection.getText();
            if (!text.isEmpty()) {
                Log.d("EdgeOCR", "detected: " + text);
            }
        }
    } catch (EdgeError e) {
        Log.e("EdgeOCR", "Failed to analyze image", e);
    } finally {
        image.close();
    }
});
ImageProxy のクローズ
image.close() を必ず finally ブロックで呼んでください。クローズしないと次のフレームが送られてきません。